Parts needed: New Valve Tools needed: Screwdriver
(Fig.1)
|
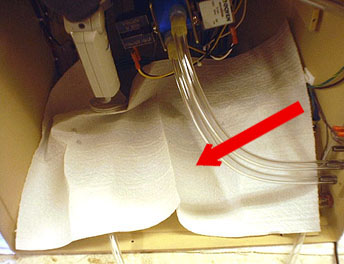
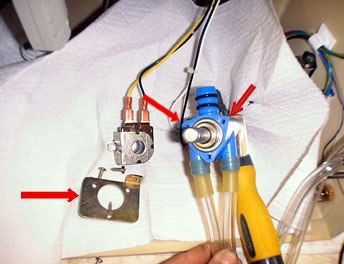
Unplug the unit and open it as per instruction book. Cover the electronic circuit board
with paper towels, a plastic sheet and another layer of paper towels. It is very important
to keep the board dry.
|
(Fig.2)
|
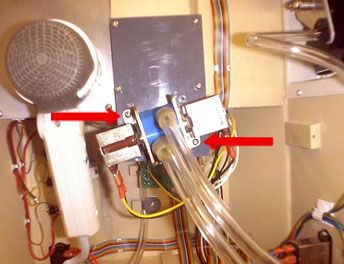
Unscrew the 2 Valve screws.
|
 |
(Fig.3)
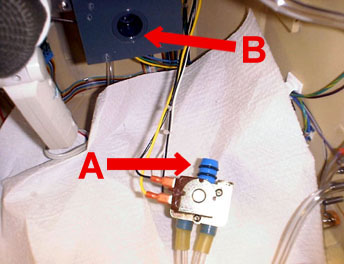 |
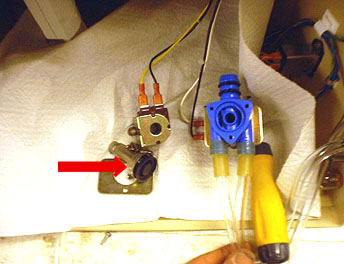
Pull the valve assembly out using a paper towel to catch
drips and lay it down on the the paper towels protecting the electronic circuit board.
Make sure that there is an "O"ring inside the coupling. The new valve
assembly also has 2 "O" rings on its main fitting.
|
(Fig.4)
|
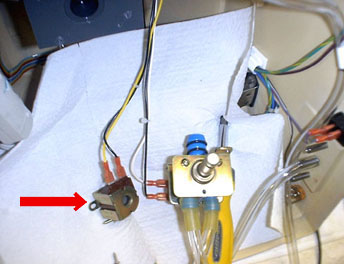
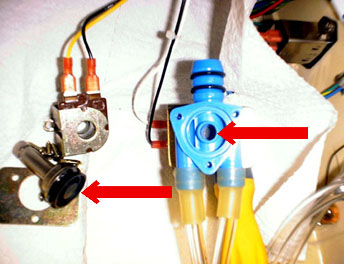
Remove the center screw, then remove the solenoid. (Fig.4) |
 |
(Fig.5)
 |
Remove the remaining two screws and pull
off the gold colored retaining plate.
|
(Fig.6)
| Remove the piston with the black rubber
seal.
|
 |
(Fig.7)
 |
Inspect the inside of the valve and the
rubber seal for any type of debris. Remove the foreign material,
reassemble the valve and test for proper operation.
|